It’s possible to create a shortcut in Windows that will always run an application as an administrator:
How can I create the necessary shortcut from the command line?
2 Answers
Introduction
Running an application as an administrator gives you full access to the system resources, which can be helpful in some cases. However, it can be a hassle to right-click on an application and select “Run as administrator” every time you want to launch it. Fortunately, you can create a shortcut that always runs the application as an administrator. In this blog post, we will discuss how to set up a shortcut to run an application always as an administrator in Windows.
Creating a Shortcut to Run an Application Always as Administrator
To create a shortcut to run an application always as an administrator, you will need to use the command prompt. Here’s how to do it:
Step 1: Open the Command Prompt
To open the command prompt, press the Windows key + R to open the Run dialog box. Type “cmd” in the box and press Enter.
Step 2: Navigate to the Application’s Directory
Navigate to the directory where the application is installed. You can use the “cd” command to change directories. For example, if the application is installed in the “Program Files” directory, you can type “cd C:Program Files” and press Enter.
Step 3: Create the Shortcut
Once you are in the application’s directory, type the following command and press Enter:
mklink /D "Shortcut Name" "Application Path"
Replace “Shortcut Name” with the name you want to give the shortcut and “Application Path” with the path to the application. For example, if you want to create a shortcut for Notepad, you can type:
mklink /D "Notepad Shortcut" "C:WindowsSystem32notepad.exe"
Step 4: Set the Shortcut to Run as Administrator
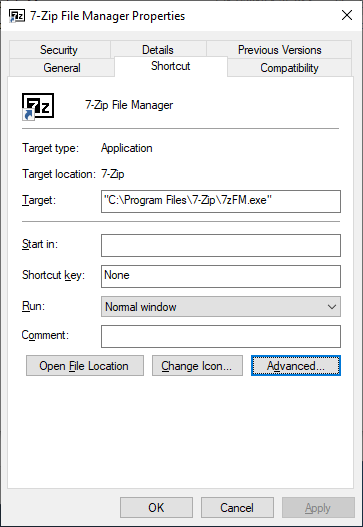
Right-click on the shortcut you just created and select “Properties”. In the Properties window, click on the “Advanced” button. Check the box that says “Run as administrator” and click “OK” to save the changes.
Step 5: Test the Shortcut
Double-click on the shortcut to test if it runs the application as an administrator. You should see a UAC (User Account Control) prompt asking for permission to run the application. Click “Yes” to proceed.
Using a Batch File to Create Multiple Shortcuts
If you need to create multiple shortcuts to run applications always as administrators, you can use a batch file. Here’s how to do it:
Step 1: Create a Text File
Open Notepad or any other text editor and create a new file. Type the following command in the file:
mklink /D "Shortcut Name" "Application Path"
Replace “Shortcut Name” with the name you want to give the shortcut and “Application Path” with the path to the application.
Step 2: Save the File as a Batch File
Click on “File” and select “Save As”. In the “Save As” dialog box, change the “Save as type” to “All Files” and name the file “shortcut.bat”. Save the file to a location of your choice.
Step 3: Add More Commands to the Batch File
You can add more commands to the batch file to create multiple shortcuts. For example, if you want to create a shortcut for Notepad and Calculator, you can add the following commands to the batch file:
mklink /D "Notepad Shortcut" "C:WindowsSystem32notepad.exe"
mklink /D "Calculator Shortcut" "C:WindowsSystem32calc.exe"
Step 4: Run the Batch File
Double-click on the batch file to run it. It will create the shortcuts for you.
Using a Third-Party Tool to Create Shortcuts
If you don’t want to use the command prompt or batch files, you can use a third-party tool to create shortcuts to run applications always as administrators. Here are some of the tools you can use:
1. Shortcut Creator
Shortcut Creator is a free tool that lets you create shortcuts to run applications always as administrators. It has a simple interface and is easy to use. To create a shortcut, simply drag and drop the application’s icon onto the Shortcut Creator window, and it will create the shortcut for you.
2. Win+X Menu Editor
Win+X Menu Editor is a tool that lets you customize the Win+X menu in Windows 8 and 10. It also has a feature to create shortcuts to run applications always as administrators. To create a shortcut, simply click on the “Add a program” button, select the application you want to create a shortcut for, and check the box that says “Run as administrator”.
3. Start Menu Reviver
Start Menu Reviver is a tool that lets you customize the Start menu in Windows 8 and 10. It also has a feature to create shortcuts to run applications always as administrators. To create a shortcut, simply right-click on the application’s icon in the Start menu and select “Create shortcut”. Then, right-click on the shortcut and select “Properties”. Check the box that says “Run as administrator” and click “OK” to save the changes.
Conclusion
Creating a shortcut to run an application always as an administrator can save you time and hassle. You can do it using the command prompt, a batch file, or a third-party tool. Whichever method you choose, make sure to test the shortcut to ensure that it runs the application as an administrator.
Adding the “Run as administrator” flag cannot be done easily through a user interface, as it requires modifying a bit within the binary file of the .LNK shortcut.
$WshShell = New-Object -comObject WScript.Shell
$Shortcut = $WshShell.CreateShortcut("$Home\Desktop\7-Zip File Manager.lnk")
$Shortcut.TargetPath = "C:\Program Files\7-Zip\7zFM.exe"
$Shortcut.Save()

$bytes = [System.IO.File]::ReadAllBytes("$Home\Desktop\7-Zip File Manager.lnk")
$bytes[0x15] = $bytes[0x15] -bor 0x20 #set byte 21 (0x15) bit 6 (0x20) ON
[System.IO.File]::WriteAllBytes("$Home\Desktop\7-Zip File Manager.lnk", $bytes)