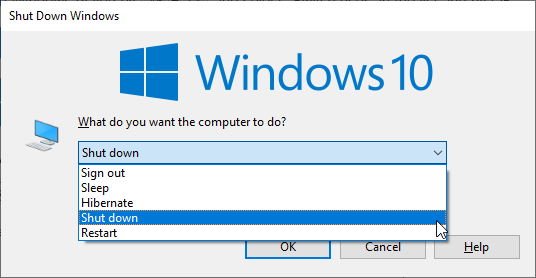
I am using Windows 10 Enterprise 1903 and I am facing a problem where I am unable to find the option to switch users on my device. Currently, I have to manually execute the tsdiscon.exe command which is not very convenient.
I am looking for a way to display the “Switch user” option in the start menu.
It is strange that I am unable to find this option in any menu on my device:
2 Answers
Introduction
Windows 10 is a widely used operating system that comes with several features to make the user experience seamless. One such feature is the option to switch user accounts, which is useful when multiple users have access to the same device. However, some users have reported that the “Switch user” option is missing from their Windows 10 start menu, making it inconvenient for them to switch between accounts. In this blog post, we will discuss how to enable the “Switch user” option in Windows 10.
Check if the “Switch user” option is enabled
Before we jump into the solution, it is important to check if the “Switch user” option is enabled or not. To do this, follow the steps below:
1. Click on the “Start” button and select “Settings” (gear icon).
2. Click on “Accounts” and select “Sign-in options” from the left pane.
3. Scroll down to the “Privacy” section and toggle on the “Use my sign-in info to automatically finish setting up my device after an update or restart” option.
4. Restart your computer and check if the “Switch user” option is now available.
If the above steps do not work, proceed to the next section.
Enable the “Switch user” option using Group Policy Editor
Group Policy Editor is a powerful tool that allows users to configure various settings in Windows. Follow the steps below to enable the “Switch user” option using Group Policy Editor:
1. Press the “Windows” key + “R” to open the Run dialog box.
2. Type “gpedit.msc” and press Enter to open the Group Policy Editor.
3. Navigate to “Computer Configuration” > “Administrative Templates” > “System” > “Logon” from the left pane.
4. Double-click on the “Hide entry points for Fast User Switching” policy from the right pane.
5. Select the “Disabled” option and click “Apply” and “OK” to save the changes.
6. Restart your computer and check if the “Switch user” option is now available in the start menu.
If the above steps do not work, proceed to the next section.
Enable the “Switch user” option using Registry Editor
Registry Editor is another powerful tool that allows users to modify various settings in Windows. Follow the steps below to enable the “Switch user” option using Registry Editor:
1. Press the “Windows” key + “R” to open the Run dialog box.
2. Type “regedit” and press Enter to open the Registry Editor.
3. Navigate to “HKEY_LOCAL_MACHINESOFTWAREMicrosoftWindowsCurrentVersionPoliciesSystem” from the left pane.
4. Double-click on the “HideFastUserSwitching” DWORD value from the right pane.
5. Change the value data from “1” to “0” and click “OK” to save the changes.
6. Restart your computer and check if the “Switch user” option is now available in the start menu.
If the above steps do not work, proceed to the next section.
Enable the “Switch user” option using Command Prompt
Command Prompt is a command-line tool that allows users to execute various commands in Windows. Follow the steps below to enable the “Switch user” option using Command Prompt:
1. Press the “Windows” key + “X” and select “Command Prompt (Admin)” from the menu.
2. Type the following command and press Enter: REG ADD "HKLMSOFTWAREMicrosoftWindowsCurrentVersionPoliciesSystem" /v HideFastUserSwitching /t REG_DWORD /d 0 /f
3. Restart your computer and check if the “Switch user” option is now available in the start menu.
If the above steps do not work, proceed to the next section.
Enable the “Switch user” option using PowerShell
PowerShell is a powerful command-line tool that allows users to automate various tasks in Windows. Follow the steps below to enable the “Switch user” option using PowerShell:
1. Press the “Windows” key + “X” and select “Windows PowerShell (Admin)” from the menu.
2. Type the following command and press Enter: Set-ItemProperty -Path "HKLM:SOFTWAREMicrosoftWindowsCurrentVersionPoliciesSystem" -Name "HideFastUserSwitching" -Value 0
3. Restart your computer and check if the “Switch user” option is now available in the start menu.
If the above steps do not work, proceed to the next section.
Conclusion
Enabling the “Switch user” option in Windows 10 is a simple process that can be done using various tools such as Group Policy Editor, Registry Editor, Command Prompt, and PowerShell. If you are experiencing issues with the “Switch user” option, try the solutions mentioned in this blog post to resolve the issue. It is important to note that modifying system settings can cause unintended consequences, so it is recommended to create a system restore point before making any changes.
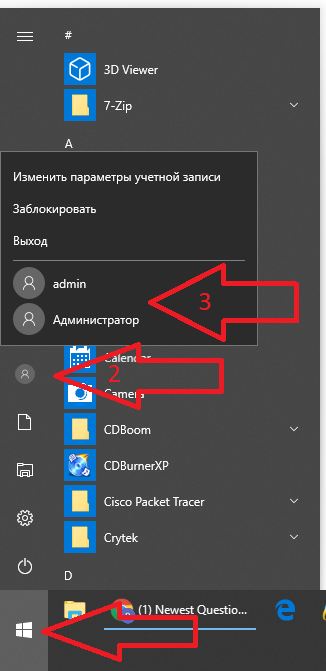
- To access the list of available users on your device, first click on the “Start” button.
- Then, locate the grey silhouette icon in the left column and click on it.
- This will open up a menu, and the lower section of the menu will display a list of all the users that are available for you to switch to.
If this icon is not visible, then:
- Open registry editor REGEDIT.EXE
- Navigate
HKEY_LOCAL_MACHINE\SOFTWARE\Microsoft\Windows\CurrentVersion\Policies\System. - Edit
HideFastUserSwitchingparameter and set its value to0.